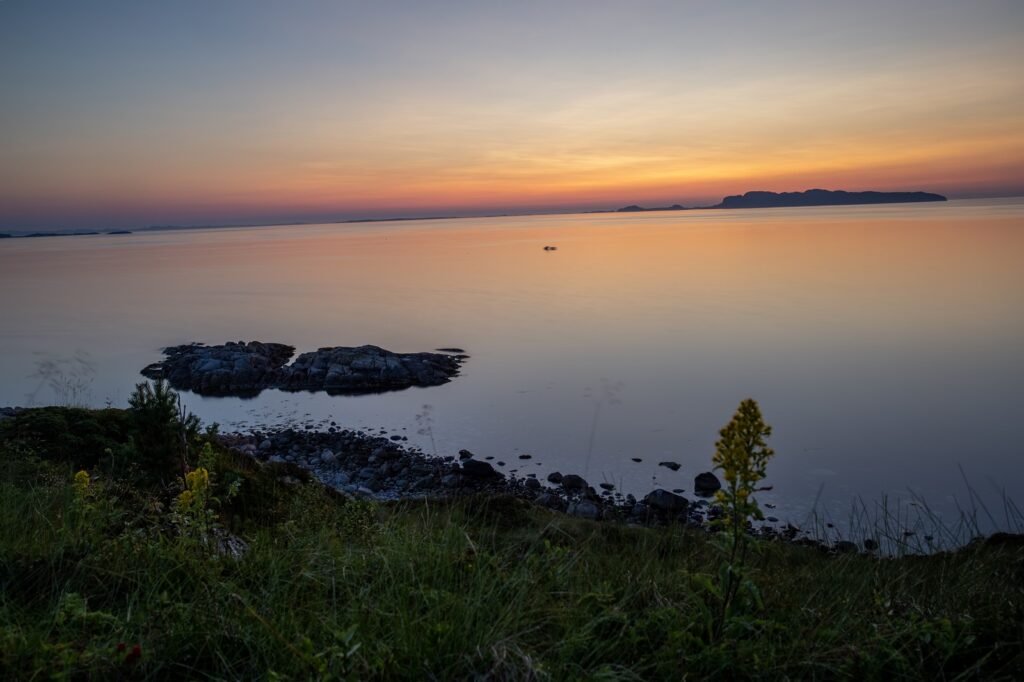
Most cameras have a feature called Histogram. The histogram represents the light intensity available in the scene and will give an indicator if some elements is too bright or dark. Watch this weeks video to get familiar with the topic
Rule of thirds
The rule of thirds is one of the first subjects you will meet when you search for photography tips and ways to improve. In this weeks episode I’m presenting the rule of thirds.
Aperture
The aperture is one of three parts in the exposure value equation. In this week’s video I present it a bit more.
Since my YouTube channel is quite new every follower counts. So if you would like to see more videos please subscribe and vote. If there are particular subjects you would like presented then fell free to leave a comment as well.
Shutter speed
Todays video is about the shutter speed. A short example on how the shutter actually work and how it affects the image you’re producing. Feel free to like and subscribe to my YouTube channel for more goodies
Going back to crop
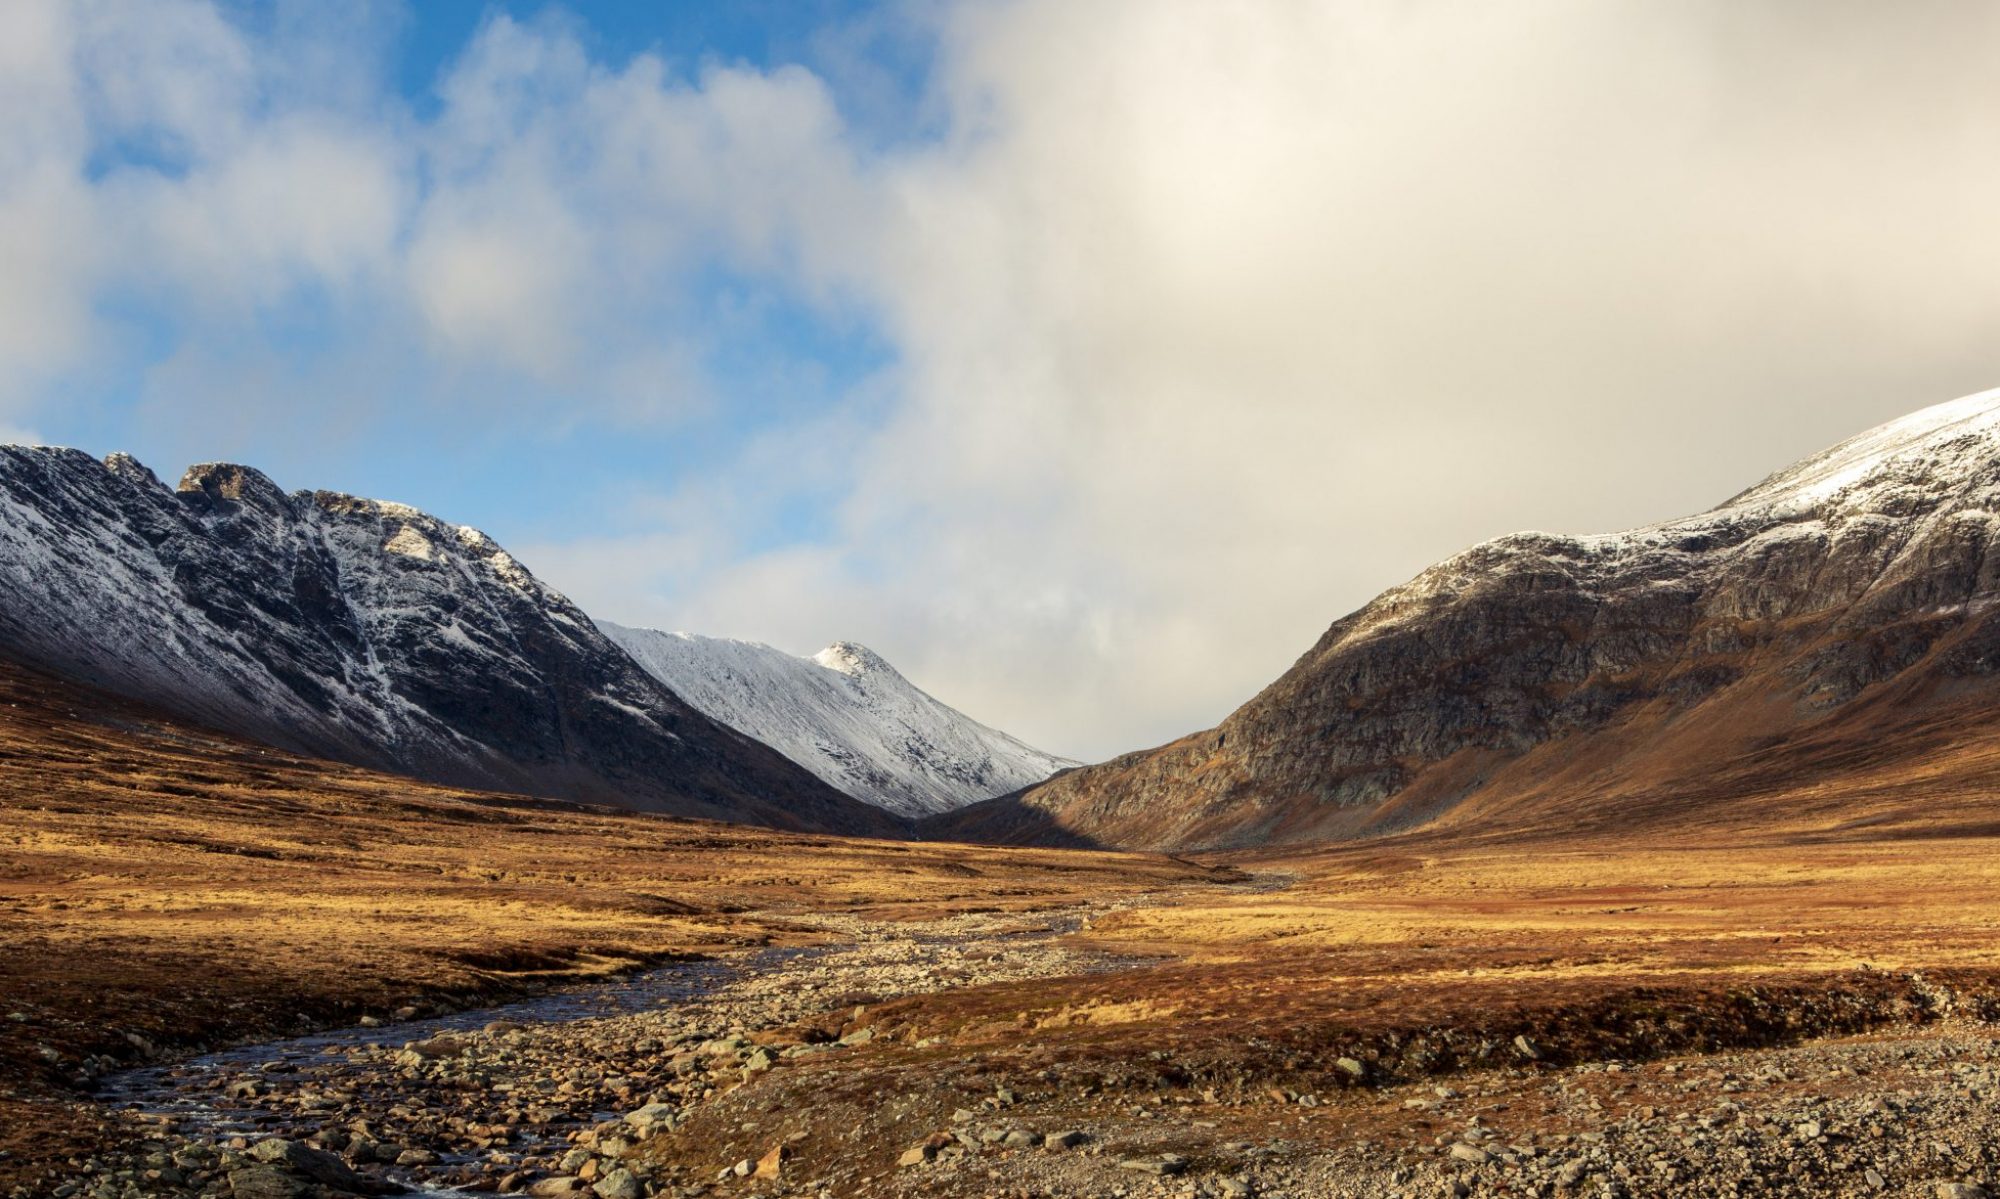
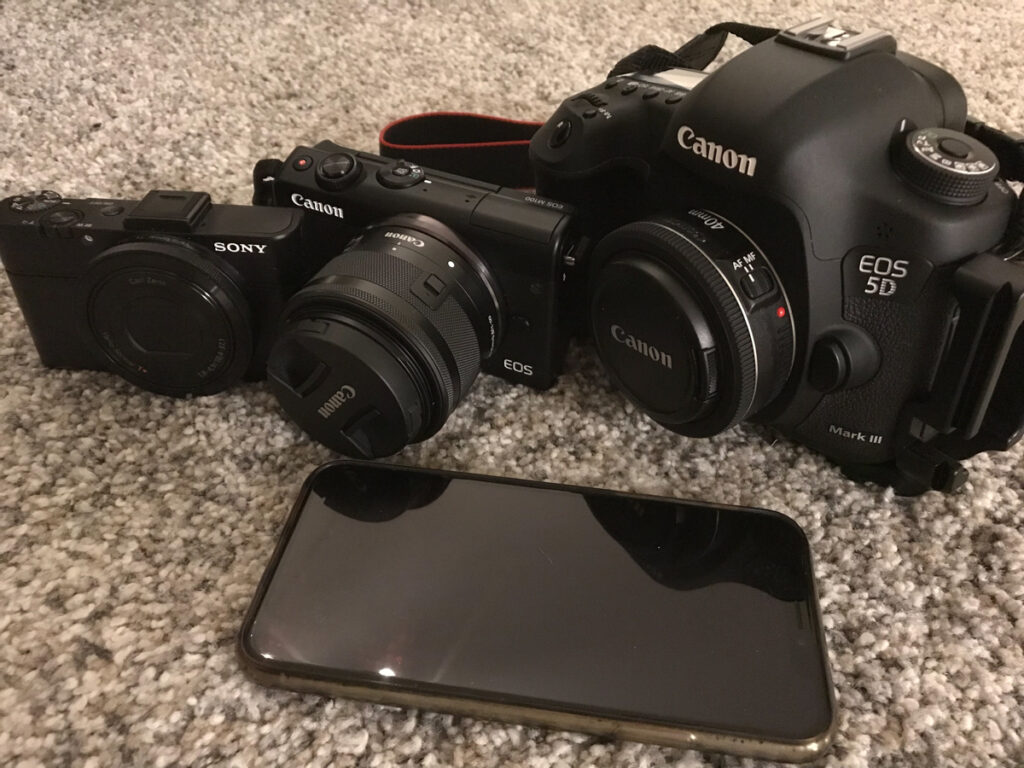
After almost a decade with a full format camera, I am considering swapping back to a crop sensor. Why? You might ask. To explain this I have to start early in my digital camera career. I started out with a compact Canon G6. 1/1.8” sensor and quite good quality. Soon I realised that photography was what wanted again after years away from a camera. So I ended up buying my first DSLR, a Canon 350D with a Sigma 24-70mm Lens. This was a great camera. One day I came across the Canon 7D I knew I had to have it. The lust for quality images grew. The quality was, in my opinion, strongly related to sensor size and the purchase of a Canon 5D Mark III was a fact.
In 2016 I realised that my expedition across the Greenlandic Icecap was going to be without my dear Canon 5D Mark III. The reason was that I had to drag along at least the 24-70mm f/2.8, a spare battery and a charging system for those 7,4V batteries. My solar charging system was only at 5V. This meant that I had to bring some bigger and heavier gear to accommodate my full frame. Ending at over 3 kilos of equipment. The result was a Sony RX100MK2. And luckily the images looks great.
A while after the expedition I got hold of a Canon M100. A nice little camera with a 15-45 lens and a 22mm lens. Both are quite acceptable but not close to the quality of the 5D. I bring along the smaller M100 on my mountain bike trips. If the trips are long I almost always regret not bringing better gear. I did how ever ditch the 5D because of its weight while packing for the trip. If the trips are short I go back later with my big camera to get those images. The M100 is a good camera, but the selection of lenses Canon got for the EF-m mount is not. There is barely a handful of choices and they are all entry level ones. Of course I could have had the adapter and bring my full size lenses, but then again the compact format of the M100 is a bit wasted.
And then a good offer from Fuji got me thinking. I’ve selected so big and heavy gear that I have upgraded myself away from mobility. The alternative I got isn’t a real alternative because I know what I could have had. And here is where the Fuji X-T4 comes into play. With professional quality glass in the 16-80mm f/4 R OIS WR it is weighing in at total of about 1 kg. About 350g more than the M100 with the kit lens and almost a kilo less that my Canon 5D with a 24-70 f/2.8. The size is acceptable as well. I could have done a lot with the 5D to get it lighter, but the fact is that the body alone is close to a kilo.
The question now all comes down to the quality of the image. And quality does not necessarily come from the amount of mega pixels on the cameras sensor. My Canon 5D Mark III got 22.3 megapixels, my 5Ds got 50.6 megapixels and my M100 24.2 megapixels. Even if the pixel count on the M100 is higher that the 5D Mark III, the 5D produces better results. To understand this one have to analyse everything from quality of the glass to the sensor technology.
The difference between the tiny mirrorless Canon M100 and the Fuji X-T4 is that Fujifilm wants the X-4T to be used by professionals and are following the camera lineup with a lineup of high quality lenses.
After almost a month of testing I’ve come to a conclusion. It is actually the X-T4 that will get to tag along on the next trips.
Starting with photography?
Have you been thinking of becoming a photographer? After years with a camera (or more) I’ll try to share my perspective and give you some advice on how to begin.
The no cost start
I have two, potentially, expensive hobbies. One is biking the other is photography. I call them both hobbies because I don’t earn enough to be a professional in neither. The one thing that annoys me the most is the fact that people for some reason needs to spend a months income just to try out a new hobby. I believe that the more you spend on figuring out if a hobby is worth doing, the harder it is to admit that it’s not. You kind of force yourself to like biking if you spend €5,000 on a bike. And the same goes with the camera.
This is why I’d recommend a no cost start. The only thing you’ll need is a camera of some sort and most smart phones today have an acceptable camera. An other option is to borrow a camera from a friend. At no cost, there is nothing at stake. Go for a walk. See if you can find anything you like to photograph. Maybe join a friend who already do photography for some tips and inspiration.
And don’t think that that one trip to the local woods is enough to determine if you will go on with your photographic carrier. Give it a month or two.
Kicking it up a notch
So you’re still out taking pictures and have figured out that you’ll upgrade from your phone to something that will give you better results? Still I’d recommend you to keep the cost low. The lower the stakes the better are the results. If you start searching for information you will find a load of forums recommending different camera equipment that you MUST have but the fact is that you really don’t need anything for a good start (remember your phone). All modern cameras today will yield acceptable results. It’s mostly about personal preference.
If you have the possibility to visit a local store hold the cameras you should do so. How the camera feels in your hand is totally different from a reviewer’s opinion on a Youtube video. Dials and knobs have to be placed so that you feel that you can reach them. And since a modern camera is more or less like a computer, you need to be comfortable with all those menus and how they work.
When you have decided on brand based on these tests I’d recommend you to buy a entry level kit with interchangeable lens. Today one normally talk about Digital Single Lens Reflex (DSLR) or Mirrorless camera. There is pros and cons for both systems. As a starter you will be fine with both. Again it is a personal preference, but it seems like most camera brands have their focus on the Mirrorless cameras these days.
If you haven’t already you will find out that there is something called crop factor. And there is a load of discussions on forums on the topic. Basically the old 35mm film has the definition of a full frame sensor in the digital world. Meaning that a full frame sensor is 36x24mm. If a sensor smaller then it has a crop factor higher that 1. So a APS-C that is 23.6×15.7mm will be 1.525 times smaller than a full frame and therefore has the definition of beeing a 1.53 crop factor.
You will find professionals using both full frame and crop factor cameras. Crop factor cameras are often smaller and lighter. Same goes with lenses. Crop factor gear is often priced lower as well.
So my general recommendation is to get a entry level mirrorless kit. In this segment there is a handful alternatives.
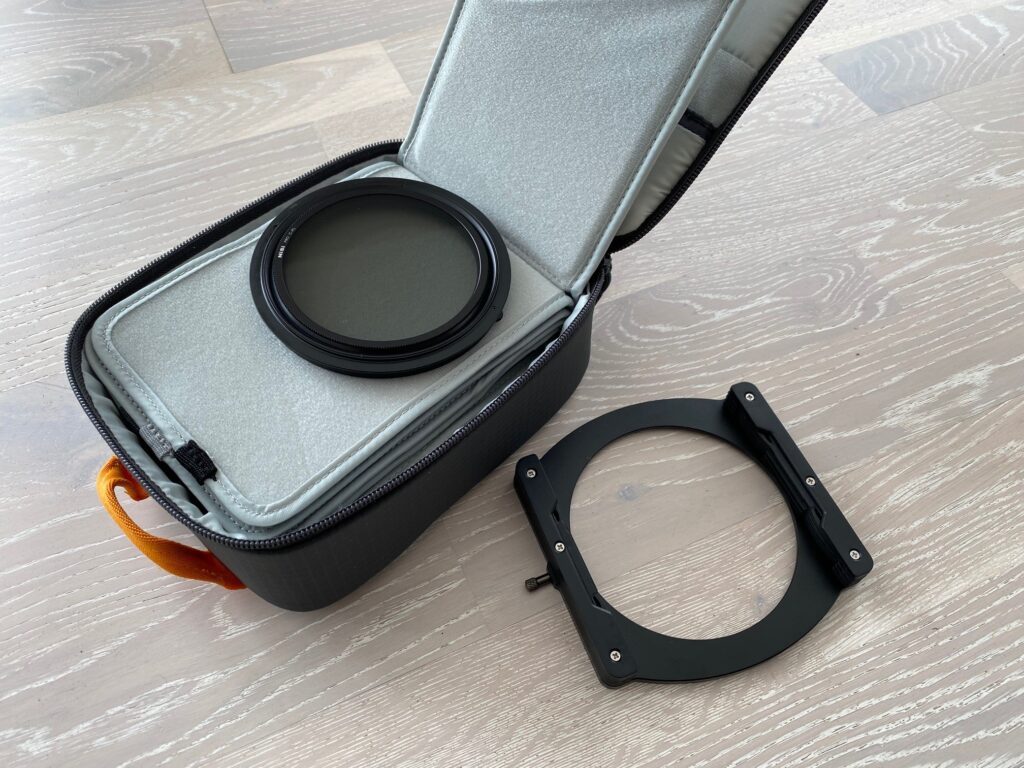
You don’t need all those filters
Back in the film days a common way to modify the final result was to add filters in front of the lens while capturing those photos. These filters can be used on a digital camera as well, but the results might be a bit different.
A lot of these filters manipulate colors. Filters like yellow filters, grey filters, red filters, warmth filters and so on, will generally be of little use as long as you know how to use a photo editing application. Combine this application with a RAW format file from your camera and you are good to go. The raw format save all your sensor information and makes it easy to adjust color warmth (Kelvin) in your image and the balance between Red, Green and Blue.
There are a couple of filters that are hard to mimic in an application. Filters that reduces light and polarizing filters. The first group is actually filter that you don’t really need unless you want a 60 second exposure at a sunny day. Neutral Density (ND) filters will just reduce the amount of light that lets trough to your sensor. You can do this partly on your camera, but a 60 second exposure is hard to compensate with high aperture value and low ISO numbers. And a photo taken with f/5.6 and 1 second exposure at ISO100 will be totally different that a photo taken with f/22 and 1/100 second exposure at ISO100. To understand the relation between aperture, time and ISO, have a look at this post.
While ND filters reduces all light other filters can reduce light at a given wave length. Night sky filters are filters that stops wave lengths from mercury vapor and sodium. This will reduce light pollution from close by cities. The most commonly used filter is the Ultra Violet (UV) filter. Film cameras had to have this filter to stop UV light from hitting the film. Today a digital camera got this filter built in, with some exceptions.
Polarizing filters will only let through light waves/rays that has a given orientation. Once you turn the filter, waves from reflections on your objects will not let through. If you use a polarizing filter on a camera pointing to a puddle or a calm lake you can decide if you want the reflection or the bottom of the puddle or lake. If the water is too deep you will only see a non-reflective surface in a dark colour. This filter can be used on most surfaces that creates reflections.
I mentioned ND filters but there is a group of ND filters that you really don’t need and that is the graduated ones. As long as you know how to use your photo editing application, applying a exposure compensation on parts of the images is really easy. If there is a big difference in exposure levels on your subjects you might need to bracket the image on two or three exposure adjustments. Adding a filter on your lens will result in a permanent adjustment on your raw file. If you put the filter on just a centigrade out of line, your image is ruined permanently.
So what you really need in your photo bag is a polarizing filter and maybe a ND filter or two if you like to take long exposures. If you’re into night photo and want to get rid of that light pollution you can buy yourself a filter that removes these wave lengths.
Hope this article was of interest for you and that it made sense. Do not hesitate asking questions or post comments.
Exposure value
In the early days I read all the technical stuff I could find about photography, but it didn’t really make me a better photographer. So my general advice is to go out there and try and fail. One day you will succeed.
I still do recommend that you go home and analyze your efforts and try to understand why your results aren’t as you expected. Understanding how composition work is not an easily learned subject, but understanding the technical result of your photo can be thought because it’s a technical answer.
So let me try to explain this in a simple manner. All cameras behave the same. Some might not have the possibility to adjust all parameters, but they do the same behind the scenes. To capture an image the camera will evaluate something called Exposure Value or EV for short. This is the amount of light reflected/emitted from the objects you want to make an image of. Now the camera does an equation of three (3) parameters. The time (T) one should spend taking the image, the amount of light (A) one should let trough during that time and the sensitivity (ISO) of the sensor.
The relationship between the four (EV, T, A and ISO) can be written as a formula. You don’t walk around thinking of formulas when you capture a beautiful scenery, or at least I don’t. So let me present a figure for you instead.
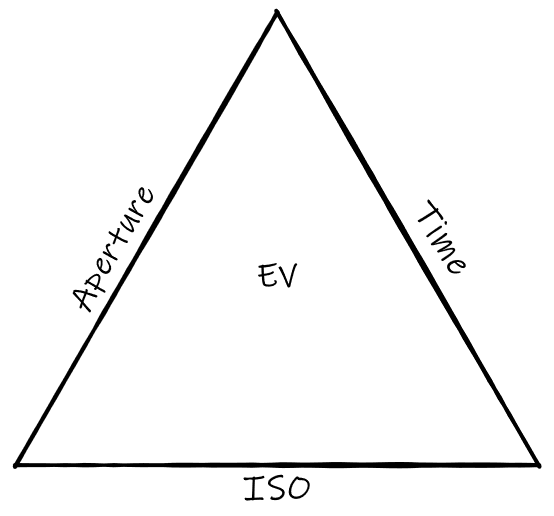
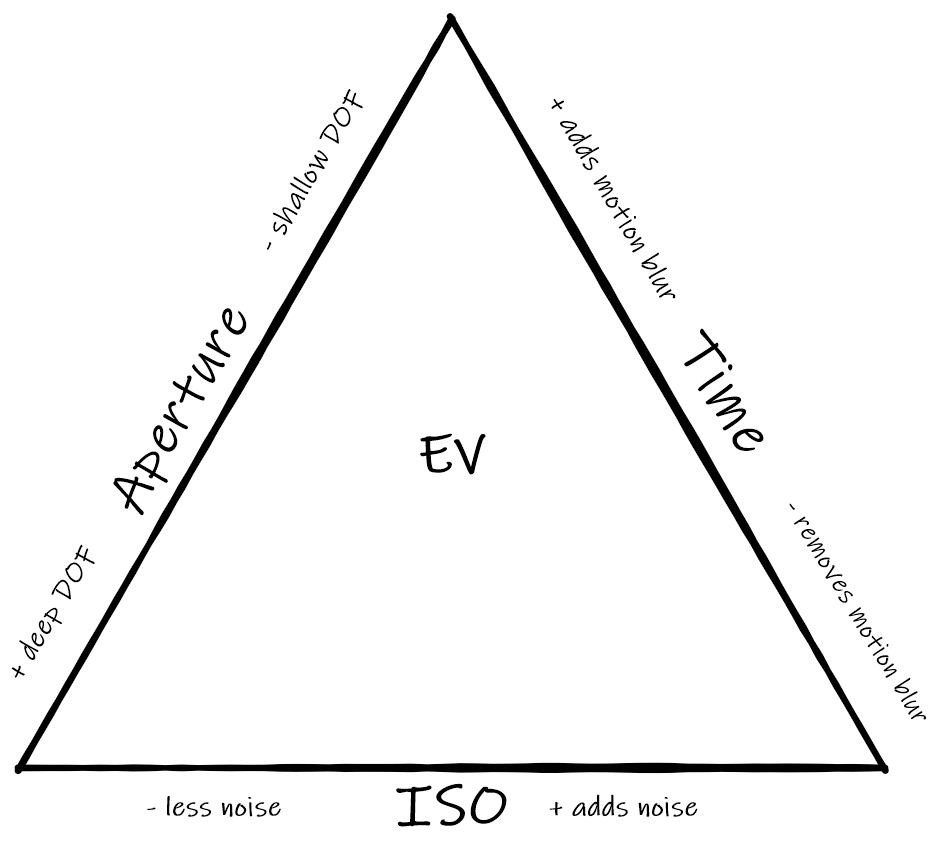
By this simplified figure one can state that, given a defined EV, one need to adjust either Aperture (amount of light that is presented to the image sensor) or Time if one wants to do an adjustment of the ISO (Sensitivity of the image sensor).
In full auto mode the camera will make an effort to adjust these parameters based on given rules. If you choose manual mode you will need to handle all these parameters yourself. So why do you really want to do this if the camera can do it? Let me explain that for you as well.
Aperture
If you look into the front glass of your camera you might see several blades going into each other. In the middle you will see a hole. The diameter of this hole is adjusted up and down according to the selected aperture number. This value is often presented as a f-number. F-number is a relation between focal length and aperture. Let’s just use this f-number for now since that is what the camera will show you. As the f-number grows the aperture diameter get smaller, resulting in less light getting to your sensor. So as the f-number grows the scenery goes darker.
But there is second effect of the aperture. As the f-number grows the depth of field also grows. Now what is depth of field (DOF) you might ask yourself. If you want a portrait with a nice blury background you want a shallow depth of field. If you have a fantastic landscape with a foreground tree and a beautiful mountain behind it, you will want both to be pin sharp. Then you want a deep depth of field (big f-number).
Time
Now time is a safe one right? Not necessarily I’d say. Time is often measured in seconds on a camera. Some talk about minutes, but this is for special occasions. So lets keep to seconds for now. The more time you spend exposing your image the more light will be presented to your sensor. What you seldom think of is how far an object will move during a second. And also how much your hands will move (shake) during a second.
With some practice you will be able to handheld your camera at about 1/[focal length] second rounded down. Say you have a 50mm on a full format camera, you will be able to handheld 1/50s which will be rounded down to 1/60s. If you concentrate you might be able to get good images at 1/30s.
Now over to your image. How far will your object move during 1/60s. A car moving at 90km/t translates to 25m/s. During that 1/60s the car has moved 42cm. This will lead to a nice and crisp image except for the car witch has motion blur. Of course this can be done by intention, but you should know the effect of a slow shutter speed (time).
ISO
The final parameter is the ISO or sensor sensitivity. Basically the higher the number the more sensitive will the sensor be. The negative side is that the more sensitive the sensor is, the harder it will be to be accurate. This introduces noise in your final image.
This can easily be illustrated with two buckets and a glass. If you fill one bucket with water and pour that water over to the other bucket it’s quite easy to stop at a certain height in that big bucket. If you take the same bucket at try to stop at a certain height in a glass, you will most certainly go over or under the line. The big bucket is a sensor at low sensitivity (small ISO number) and the glass is a sensor at high sensitivity (big ISO number). The deviation between the height in the glass and in the bucket will be visualized as noise.
Summary
So let’s try this in normal day light. The Exposure Value is at a level that can leave the ISO to a standard 100 or maybe even a extended low value at 50. The Aperture (f-number) can be placed at maybe f/8 and the time at 1/200s. This means that any camera can operate at it’s best. Even the mobile phone camera gives acceptable results. A camera set to automatic mode will give you good quality images in most cases.
Now let’s imagine another situation. You’re out during the twilight to capture some wild animals. The light conditions are totally different. The Exposure Value will be quite low. You have your long focal length lens with you to capture those shy animals. It might be a 300mm or 400mm lens. Handheld you will need about 1/300s, so maybe you are lucky if you get a good shot at 1/200s. The lens has a f/5.6 at minimum meaning that you have to sacrifice something. Either time has to go up or ISO has to go up. You either introduce motion blur (you are moving the camera while capturing the image or the animal will move) or you add noise.
Most cameras will struggle with this in automatic mode. This is actually outside the comfort zone of the camera. The camera is programmet to reduce speed and f-number down to a certain level and then start rising the ISO number. With manual mode you’re able to do some tweaking of these parameters and the amount of acceptable images might go up. Here is where you should be in control of all those parameters yourself.
A final note to camera gear is that an expensive camera body will add less noise on higher ISO-numbers. An expensive lens will have smaller f-numbers that allows more light to get to your image sensor. This does not mean that you need to spend a fortune on new gear, but now that you know your gear limitations you can go out there and push it to its limits and see what you have to deal with.
Good luck!
Bringing the camera
One of my favorite activities, in addition to photography, is bicycling. Singel track and real mountain biking is my favorite. There is something about the big vistas and the majestic mountains in Norway that really calms the mind. Or just grab the bike and ride the local tracks for an hour or so. (More about my biking can be found at sykkelhjulet.no)
I’ve always had a camera with me. But that camera often was my mobile phone. In the right conditions it is a good camera as well, but not always. This season I’ve had my small mirrorless Canon M100 with me as well. And it has already proven itself usefull.
My advice for you this time is to always bring your camera.
Five common mistakes
Every now and then I surf the web looking for inspiration and where ever I look I find images that would be very beautiful if it weren’t for that quite obvious mistake.
I do make a lot of them myself and most often I see them during post processing and maybe i manage to get rid of the problem. If not, I’m not going public with that picture.
So let me dig into the details and tell you the most common mistakes done.
Incomplete central objects
This is one of those mistakes I did more frequently, but now a days I’m more aware of it. I often see images with chopped of mountain peaks, half buildings, arms or foots entering the frame from the edges or branches entering the frame mid air. This mistake can be used intentionally as an illusion, but you should really be aware of your edges and give objects enough room.
Non-leveled image
Not leveling the image is one of the mistakes that really destroys an image. It is also one of the intentional mistakes that can extend objects otherwise blended into the image. It is one of the rules that you should really be aware of before you break or bend it.
It is easiest seen in images where the horizon is present. Seeing a beautiful sunset where the ocean is not leveled is horrible. Leveling a non-leveled tree and then rendering other elements non-leveled can be just as bad.
So my suggestion is that you pay attention to your cameras internal leveling tools or use your tripods bubble level. Once you know how to level your images you will also see that you can emphasize objects by bending this rule. A quite steep hill might become even steeper if you tilt the camera just a little.
Out of focus image
A out of focus image is one of those mistakes you cannot fully heal in post process. So paying attention to focus and where the camera is setting focus is critical. One of the main camera parameters is the aperture. The aperture number, often presented as a f-number, will tell you what area in your frame that would be sharp.
Common objects that end up not being sharp is foreground objects like flowers, grass and straws. A colorful flower out of focus will draw a lot of attention in the wrong direction in your image. In portraits eyes should always be in focus. Too wide aperture (small f-number) will render the portraits nose out of focus. Choosing another mode than auto on the camera will reveal the possibility of selecting focus points manually. Selecting the focus point where you would like the image to be at its sharpest is recommended.
Focus and camera technologies are two topics that you will find a lot of information on. There is a handful of approaches on how you will get images acceptably sharp. My advice is to know your camera and know what you would like to be in focus when you frame your image. When you get an out of focus image, analyze what happened and try to correct your mistake the next time you frame your image.
Post process exaggeration
When the digital cameras became common the, almost magical, art of post processing became more available too. Even your smartphone have tools for post processing. Enhancing some elements in your images makes them even better. There might be a color that should be saturated a bit or maybe the image would look better when slightly sharpened.
Some tend to go crazy here. Over saturation and heavily contrasted images will never look good. When you push those post processing sliders a bit over the edge, unwanted effects like halos will appear.
So learn to post process your images and ask for second opinions.
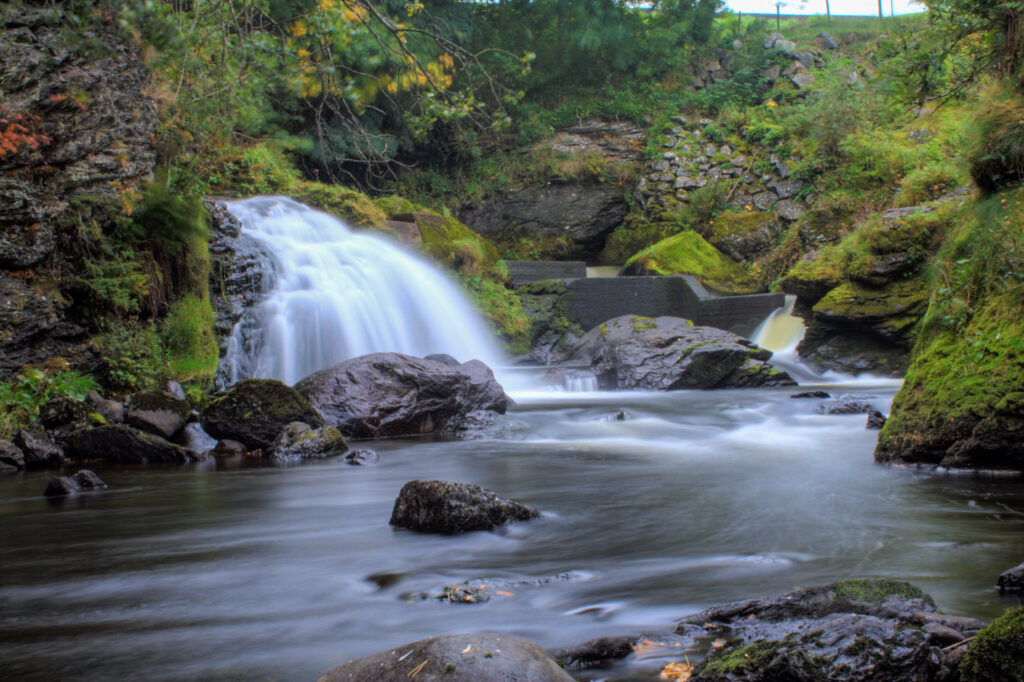
The image above might look OK the first time you see it, but have a look at de details. The little waterfall to the right has a yellow glow to it. The moss to the left of the main waterfall has some strange droplet looking effect on them. This is a typical sign of post process exaggeration.
Signature craziness
And then your master piece is done. Of course you would like to keep it for your self, but still present it to the world. The one thing most people do is to add a signature to the image. And placing a signature can actually give a professional final result.
But adding a massive signature or even watermarking the whole image with your signature will not give that professional result you’re looking for. It will draw too much attention and distract the viewer. Adding objects like a camera or elements that does not exclusively present you for who you are will not work either.
Create yourself a unique looking simple signature and add this to all your images. The size should not be more than 10% of the width and height of the image. If you are afraid that others might use your image, then scale it down before you upload it to the web. Longest edge of 1024 pixels will be acceptable for on screen presentation but almost unusable for printing.
Of course you might have done one or more of the above intentionally, but you should really know the rules before you break them.
Now go out there and get those images 🙂