In the early days I read all the technical stuff I could find about photography, but it didn’t really make me a better photographer. So my general advice is to go out there and try and fail. One day you will succeed.
I still do recommend that you go home and analyze your efforts and try to understand why your results aren’t as you expected. Understanding how composition work is not an easily learned subject, but understanding the technical result of your photo can be thought because it’s a technical answer.
So let me try to explain this in a simple manner. All cameras behave the same. Some might not have the possibility to adjust all parameters, but they do the same behind the scenes. To capture an image the camera will evaluate something called Exposure Value or EV for short. This is the amount of light reflected/emitted from the objects you want to make an image of. Now the camera does an equation of three (3) parameters. The time (T) one should spend taking the image, the amount of light (A) one should let trough during that time and the sensitivity (ISO) of the sensor.
The relationship between the four (EV, T, A and ISO) can be written as a formula. You don’t walk around thinking of formulas when you capture a beautiful scenery, or at least I don’t. So let me present a figure for you instead.
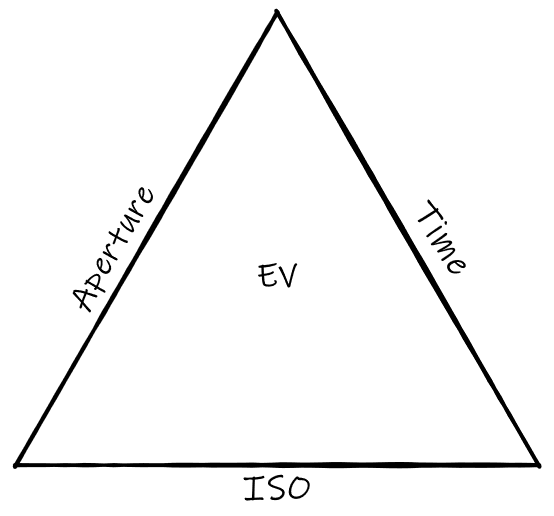
By this simplified figure one can state that, given a defined EV, one need to adjust either Aperture (amount of light that is presented to the image sensor) or Time if one wants to do an adjustment of the ISO (Sensitivity of the image sensor).
In full auto mode the camera will make an effort to adjust these parameters based on given rules. If you choose manual mode you will need to handle all these parameters yourself. So why do you really want to do this if the camera can do it? Let me explain that for you as well.
Aperture
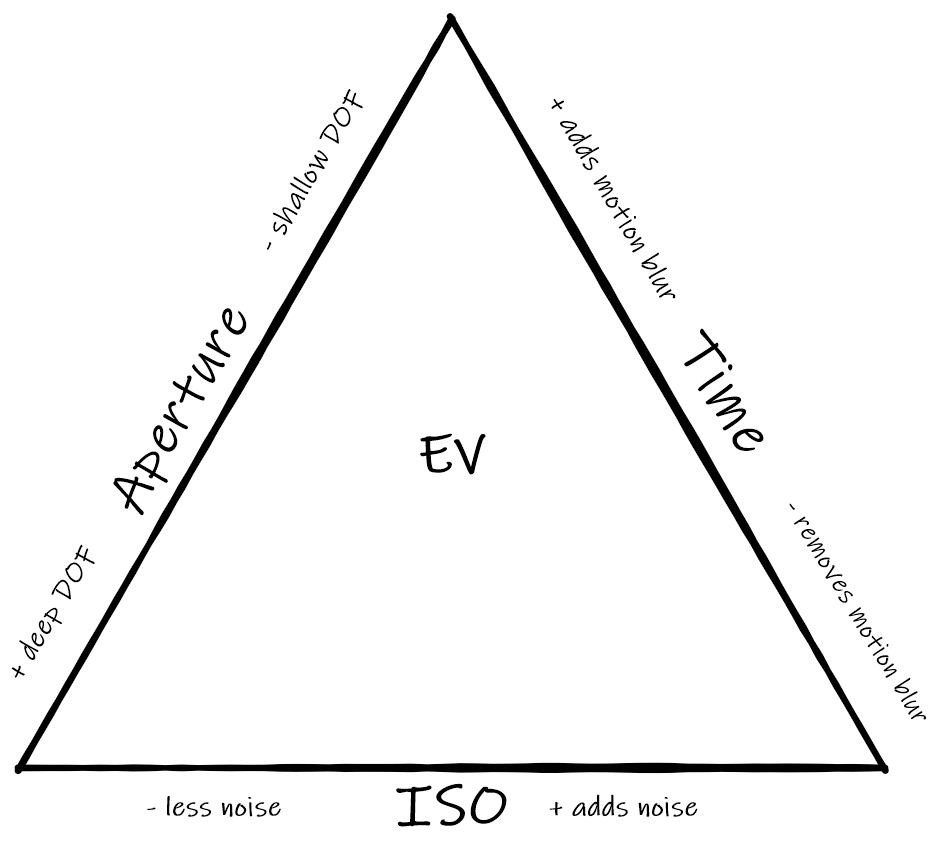
If you look into the front glass of your camera you might see several blades going into each other. In the middle you will see a hole. The diameter of this hole is adjusted up and down according to the selected aperture number. This value is often presented as a f-number. F-number is a relation between focal length and aperture. Let’s just use this f-number for now since that is what the camera will show you. As the f-number grows the aperture diameter get smaller, resulting in less light getting to your sensor. So as the f-number grows the scenery goes darker.
But there is second effect of the aperture. As the f-number grows the depth of field also grows. Now what is depth of field (DOF) you might ask yourself. If you want a portrait with a nice blury background you want a shallow depth of field. If you have a fantastic landscape with a foreground tree and a beautiful mountain behind it, you will want both to be pin sharp. Then you want a deep depth of field (big f-number).
Time
Now time is a safe one right? Not necessarily I’d say. Time is often measured in seconds on a camera. Some talk about minutes, but this is for special occasions. So lets keep to seconds for now. The more time you spend exposing your image the more light will be presented to your sensor. What you seldom think of is how far an object will move during a second. And also how much your hands will move (shake) during a second.
With some practice you will be able to handheld your camera at about 1/[focal length] second rounded down. Say you have a 50mm on a full format camera, you will be able to handheld 1/50s which will be rounded down to 1/60s. If you concentrate you might be able to get good images at 1/30s.
Now over to your image. How far will your object move during 1/60s. A car moving at 90km/t translates to 25m/s. During that 1/60s the car has moved 42cm. This will lead to a nice and crisp image except for the car witch has motion blur. Of course this can be done by intention, but you should know the effect of a slow shutter speed (time).
ISO
The final parameter is the ISO or sensor sensitivity. Basically the higher the number the more sensitive will the sensor be. The negative side is that the more sensitive the sensor is, the harder it will be to be accurate. This introduces noise in your final image.
This can easily be illustrated with two buckets and a glass. If you fill one bucket with water and pour that water over to the other bucket it’s quite easy to stop at a certain height in that big bucket. If you take the same bucket at try to stop at a certain height in a glass, you will most certainly go over or under the line. The big bucket is a sensor at low sensitivity (small ISO number) and the glass is a sensor at high sensitivity (big ISO number). The deviation between the height in the glass and in the bucket will be visualized as noise.
Summary
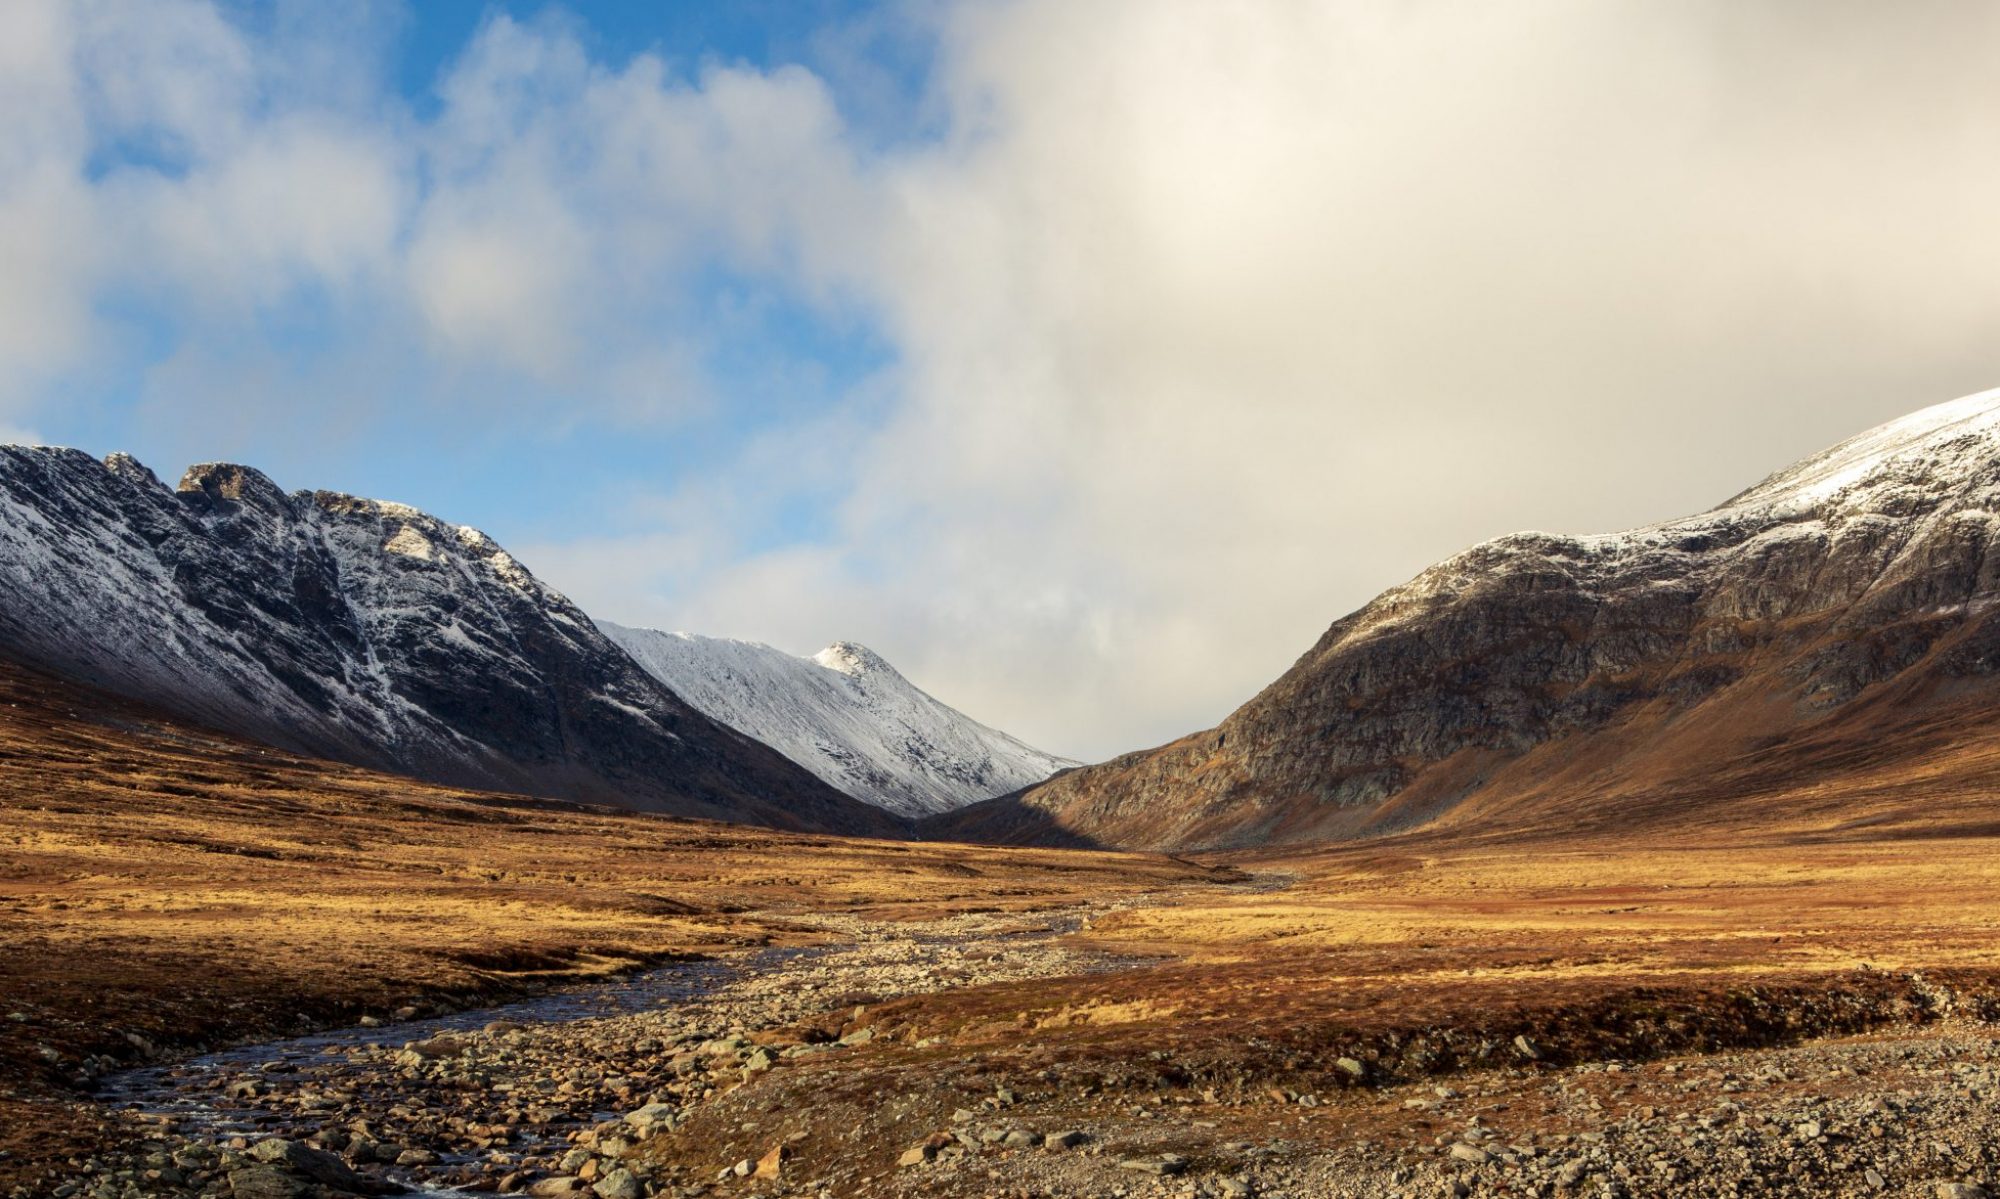
So let’s try this in normal day light. The Exposure Value is at a level that can leave the ISO to a standard 100 or maybe even a extended low value at 50. The Aperture (f-number) can be placed at maybe f/8 and the time at 1/200s. This means that any camera can operate at it’s best. Even the mobile phone camera gives acceptable results. A camera set to automatic mode will give you good quality images in most cases.
Now let’s imagine another situation. You’re out during the twilight to capture some wild animals. The light conditions are totally different. The Exposure Value will be quite low. You have your long focal length lens with you to capture those shy animals. It might be a 300mm or 400mm lens. Handheld you will need about 1/300s, so maybe you are lucky if you get a good shot at 1/200s. The lens has a f/5.6 at minimum meaning that you have to sacrifice something. Either time has to go up or ISO has to go up. You either introduce motion blur (you are moving the camera while capturing the image or the animal will move) or you add noise.
Most cameras will struggle with this in automatic mode. This is actually outside the comfort zone of the camera. The camera is programmet to reduce speed and f-number down to a certain level and then start rising the ISO number. With manual mode you’re able to do some tweaking of these parameters and the amount of acceptable images might go up. Here is where you should be in control of all those parameters yourself.
A final note to camera gear is that an expensive camera body will add less noise on higher ISO-numbers. An expensive lens will have smaller f-numbers that allows more light to get to your image sensor. This does not mean that you need to spend a fortune on new gear, but now that you know your gear limitations you can go out there and push it to its limits and see what you have to deal with.
Good luck!
One Reply to “Exposure value”
Comments are closed.